13 Jul 2026
How to Use Reference Images for Character Consistency in Nano Banana
Introduction
You built the perfect character in one image. Then you asked for a second scene, and suddenly the face was subtly wrong—a different nose, a different jaw, a person who was almost your character but not quite.
That drift is one of the biggest frustrations in AI image creation, and reference images are how you reduce it.
Most people use reference images incorrectly. They upload ten photos, describe the character again in every prompt, and then wonder why the model keeps improvising.
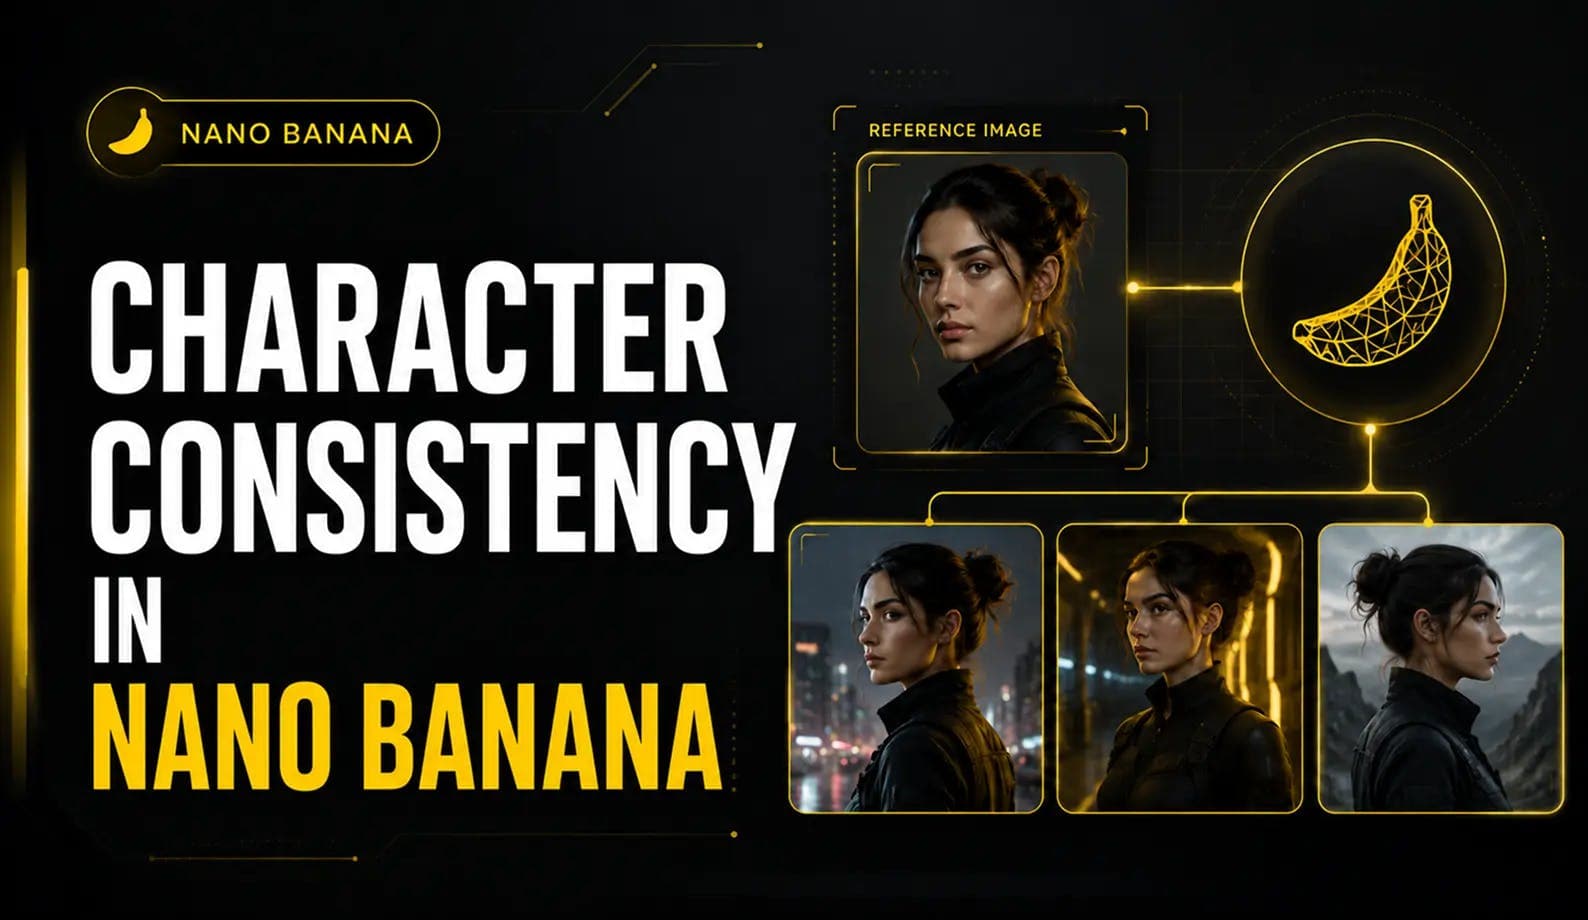
When used properly, reference-image conditioning can keep a character’s face, outfit, and overall visual style consistent across multiple scenes.
This guide explains the correct workflow based on Google’s prompting guidance. For a deeper explanation of how consistency works, read our guide on how Nano Banana maintains character consistency across edits.
First, Forget the “3 Reference Images” Rule
Many older tutorials claim that Nano Banana accepts only three reference images. That information is outdated.
According to the Gemini image generation documentation and Google’s Nano Banana Pro announcement, the current capabilities are more generous.
| Capability | Original Nano Banana | Nano Banana Pro |
|---|---|---|
| Total Reference Images | Multi-image blending with no published hard limit | Up to 14 |
| Consistent People | Not publicly specified | Up to 5 people |
| Output Resolution | Approximately 1024px | 1K, 2K, or 4K |
| Supported Inputs | PNG, JPEG, WEBP, HEIC, and HEIF | Same |
Google explains that Nano Banana Pro can blend more visual elements while preserving the resemblance and consistency of up to five people.
However, the maximum number of reference images is only a technical ceiling. Uploading more images does not automatically produce better character consistency.
In many cases, fewer high-quality references work better than a large collection of inconsistent images.
The One Rule That Fixes Most Character Drift
Google DeepMind’s prompting guidance recommends uploading clear reference images and assigning a distinct name to every important character or object.
Naming is the mechanism that helps the model follow the subject across multiple prompts.
Instead of writing:
The woman walks into a café.
Write:
Maya walks into a café.
Instead of referring to an item as:
The jacket
Define it as:
Maya’s red leather jacket
Once you define Maya using a reference image, future prompts can refer to her by name.
You do not need to describe her facial structure, hairstyle, skin tone, and outfit again in every prompt. Repeating those details can encourage the model to reinterpret them.
Define the Character Once
In your first prompt, establish the relationship between the uploaded image and the character name.
For example:
The person shown in the reference image is Maya. Preserve Maya’s facial features, hairstyle, skin tone, age, and overall appearance throughout this conversation.
After that, use Maya’s name consistently.
Prompt Anatomy for Character Consistency
Google provides two useful prompting structures for reference-image generation and text-to-image creation.
Reference-Image Prompt Formula
[Reference images] + [Relationship instruction] + [New scenario]
Text-to-Image Prompt Formula
[Style] + [Subject] + [Setting] + [Action] + [Composition]
Google’s prompting guidance also recommends describing the scene naturally instead of entering a disconnected list of keywords.
A descriptive paragraph usually gives the model more context and produces a more coherent result.
Example of a Strong Consistency Prompt
Using the reference image of Maya, keep her facial features, hairstyle,
skin tone, and overall identity exactly the same.
Place Maya in a sunlit café reading a book. She is seated beside a large
window with warm morning light entering the room. Use a photorealistic
style with an eye-level medium shot.
This prompt works because it includes:
- One clearly named subject
- A direct identity-preservation instruction
- A specific new scene
- A defined visual style
- A clear camera composition
Most importantly, only the scene changes. The character remains fixed.
The Best-Practice Workflow
Following a controlled workflow can significantly reduce identity drift.
The multi-turn editing approach uses the same general engine behind multi-image fusion, but it allows you to make smaller and more controlled changes.
New to the platform? Read our Nano Banana beginner’s guide before working with complex reference-image prompts.
| Step | Action | Why It Matters |
|---|---|---|
| 1 | Start with 2–4 references, not 14 | Too many inputs can cause the model to average facial features and weaken the character’s identity. Add more references only when the existing images do not show enough detail. |
| 2 | Use high-resolution references | Ideally, use images that are 1024×1024 or larger. Blurry, compressed, or poorly lit references provide less identity information. |
| 3 | Define the character once by name | Assign a distinct name, such as “Maya,” in the first prompt. In later prompts, use the name instead of describing the character again. |
| 4 | Change one variable per turn | Change the setting, action, outfit, lighting, or composition individually. Changing everything at once makes drift more likely. |
| 5 | Use multi-turn editing instead of mega-prompts | Conversational editing allows each prompt to build on the previous result instead of regenerating the entire image from one complicated instruction. |
Step 1: Select Two to Four Strong References
Begin with a small set of clean, consistent images.
Useful references may include:
- One front-facing portrait
- One three-quarter facial angle
- One full-body image
- One image showing important clothing or accessories
Avoid uploading many images with different hairstyles, ages, makeup styles, lighting conditions, or facial expressions.
The model may treat those differences as equally valid interpretations of the character.
Step 2: Use Clear, High-Resolution Images
Reference images should be:
- Sharp and properly focused
- Well lit
- Free from heavy filters
- Large enough to show facial details
- Consistent in appearance
A low-resolution image gives the model fewer details to preserve. If the eyes, jawline, hairstyle, or clothing are unclear in the reference, those elements may change during generation.
Step 3: Assign a Name
Give the character a simple and distinct name.
For example:
The person in Reference Image 1 is Maya.
For multiple characters, define each person separately:
The woman in Reference Image 1 is Maya.
The man in Reference Image 2 is Daniel.
Keep Maya and Daniel visually consistent with their respective references.
Once the names are established, continue using the same names throughout the editing session.
Step 4: Change One Thing at a Time
Avoid asking the model to change the location, clothing, camera angle, expression, pose, and lighting in one prompt.
Instead, build the scene gradually.
Turn One: Change the Location
Keep Maya exactly the same and place her inside a modern café.
Turn Two: Change the Action
Keep the same Maya and the same café. Show Maya reading a book.
Turn Three: Adjust the Lighting
Keep Maya, her pose, outfit, and the café unchanged. Add warm morning
sunlight entering through the window.
This controlled sequence makes it easier to identify which instruction caused the character to drift.
Step 5: Continue Editing the Existing Result
Do not restart the entire generation every time something needs adjustment.
Use the previous image as the foundation and modify only the incorrect element.
For example:
Keep everything else exactly the same. Correct only Maya’s jacket so it
matches the red leather jacket shown in the reference image.
This is safer than asking the model to recreate the whole scene.
The Mistakes That Cause Character Drift
Almost every consistency problem can be traced back to a few common errors.
| Common Mistake | What to Do Instead |
|---|---|
| Uploading too many references | Use two to four clean references. Ten images taken from different angles or lighting conditions can cause the model to average the character’s identity. |
| Re-describing the character in every turn | Define the character once with a name. In future prompts, change only the action, setting, or other required variable. |
| Using words such as “new” or “different” | Say “the same Maya” instead of “a woman who looks like Maya.” Words such as “new” and “different” encourage variation. |
| Fixing the wrong variable | When the outfit is incorrect, edit only the outfit. Do not regenerate the entire scene and risk changing elements that were already correct. |
| Using low-quality references | Use sharp, well-lit, high-resolution source images that clearly show the character’s identity. |
Uploading Too Many References
More references can help when each image provides useful information.
However, too many visually inconsistent references can confuse the model.
For example, imagine uploading ten images of the same person with:
- Different hair lengths
- Different makeup styles
- Different apparent ages
- Different lighting conditions
- Different camera lenses
- Different facial expressions
The model may combine those variations instead of identifying one definitive appearance.
Start small and add another reference only when it solves a specific problem.
Re-Describing the Character
Repeated descriptions often create subtle variations.
For example, the following prompts may look consistent to a human:
A young woman with dark brown hair and an oval face.
A woman in her twenties with long brunette hair and soft facial features.
However, the model can interpret them as two different people.
After defining the character, use:
The same Maya
This creates a stronger continuity signal.
Using “Looks Like” Language
Avoid phrases such as:
A woman who looks like Maya
This instruction allows the model to create a similar person rather than preserve the exact character.
Use direct language:
Use the same Maya from the reference image.
Regenerating the Entire Image to Fix One Detail
Suppose the face, pose, background, and lighting are correct, but the jacket is wrong.
Do not write:
Generate the entire scene again with the correct jacket.
Instead, write:
Keep Maya’s face, pose, hairstyle, background, lighting, and camera angle
unchanged. Replace only the jacket with the same red leather jacket shown
in the reference image.
The more clearly you protect the correct elements, the less likely they are to change.
Prompt Templates for Consistent Characters
The following templates can be adapted to different image-generation workflows.
Basic Character Reference Prompt
The person shown in the uploaded reference images is Maya.
Preserve Maya’s identity, including her facial structure, eyes, nose,
jawline, hairstyle, skin tone, age, and overall appearance.
Create a photorealistic image of Maya standing inside a modern bookstore.
Use soft natural lighting and an eye-level medium shot.
New Scene Prompt
Keep the same Maya from the previous image.
Place Maya on a quiet city street during the early morning. Preserve her
face, hairstyle, age, body proportions, and outfit exactly. Change only
the location and background.
Outfit Change Prompt
Keep Maya’s face, hairstyle, skin tone, body proportions, pose, lighting,
background, and camera angle unchanged.
Replace only her outfit with a navy-blue business suit and white shirt.
Expression Change Prompt
Keep the same Maya, clothing, pose, background, lighting, and camera angle.
Change only her facial expression to a natural, subtle smile.
Camera-Angle Change Prompt
Keep Maya’s identity, outfit, location, lighting, and expression exactly
the same.
Show the scene from a slightly lower camera angle. Do not change Maya’s
facial features or body proportions.
Two-Character Consistency Prompt
The woman in Reference Image 1 is Maya.
The man in Reference Image 2 is Daniel.
Preserve the facial features, hairstyles, skin tones, ages, and overall
identities of Maya and Daniel.
Place Maya and Daniel at the same café table having a natural conversation.
Use warm indoor lighting and an eye-level medium-wide composition.
How to Build a Consistent Character Sheet
A character sheet can provide a stable visual foundation before you begin creating scenes
Recommended Character-Sheet Views
Create a sheet containing:
- Front-facing portrait
- Left three-quarter angle
- Right three-quarter angle
- Side profile
- Full-body front view
- Full-body side view
- Neutral facial expression
- Smiling facial expression
Keep the lighting, hairstyle, clothing, and visual style consistent across every view.
Character-Sheet Prompt
Using the uploaded reference image of Maya, create a professional character
reference sheet.
Preserve Maya’s exact identity, facial features, hairstyle, skin tone, age,
and body proportions.
Include a front-facing portrait, left three-quarter view, right three-quarter
view, side profile, and full-body front view.
Use consistent neutral studio lighting, a simple light-gray background,
and the same clothing in every panel.
Once the sheet is generated, use its clearest panels as references for future scenes.
How to Maintain Outfit Consistency
Character consistency includes more than the face. Clothing can also drift between generations.
Give important outfits a distinct name.
For example:
This outfit is Maya’s red leather outfit.
Then refer to it consistently:
Keep Maya wearing the same red leather outfit.
For complex clothing, define the important elements once:
Maya’s red leather outfit consists of a cropped red leather jacket, a
plain black shirt, dark straight-leg jeans, and black ankle boots.
Avoid changing clothing terminology between prompts. Calling the same item a “red jacket,” “leather coat,” and “cropped biker jacket” may encourage visual variation.
How to Maintain Style Consistency
A character can remain recognizable while the overall image style changes.
To prevent this, define the visual style separately from the character.
For example:
Visual style: cinematic photorealism with natural skin texture, soft
contrast, realistic lighting, and subtle film grain.
Reuse the same style description across scenes.
You can also name the style:
Call this visual treatment the Maya Cinematic Style.
Later prompts can say:
Use the same Maya and the same Maya Cinematic Style.
This helps preserve both identity and visual direction.
Watch a Full Consistency Build
The following tutorial demonstrates a reference-image workflow that begins with one source photo and expands it into a complete multi-scene image set.
Recommended Tutorial
▶ Watch: How to Get Perfect Character Consistency With Nano Banana Pro
Approximate duration: 12 minutes.
Additional Walkthroughs
You may also find these tutorials useful:
- How to Make 100 Consistent Characters With Nano Banana, approximately 14 minutes
- Consistent Character Sheets in Nano Banana With Prompts, approximately 10 minutes
These walkthroughs are especially useful for understanding how small prompt changes affect identity, clothing, pose, and scene continuity.
Frequently Asked Questions
How Many Reference Images Can Nano Banana Use?
Nano Banana Pro supports up to 14 reference images in total and can preserve the consistency of up to five people in one generation.
In practical workflows, two to four clean reference images often produce better results than using the maximum number.
Why Does My Character Keep Changing Between Images?
The two most common causes are conflicting reference images and repeated character descriptions.
Use a small group of consistent references, assign the character a name, and refer to that name in later prompts. Change only the scene, action, lighting, or other required variable.
Do I Need Nano Banana Pro, or Does the Base Model Work?
The base Nano Banana model can handle character consistency for many standard workflows.
Nano Banana Pro adds higher output resolutions and a larger reference-image capacity, which can be useful for complex scenes involving several characters or visual elements.
What Resolution Should My Reference Images Be?
Use the highest-quality images available. A resolution of 1024×1024 or larger is a good starting point.
The images should also be sharp, well lit, and free from heavy filters or compression artifacts.
Does Naming Characters Really Matter?
Yes.
Assigning a distinct name to a character gives the model a stable identifier that can be reused across multiple turns.
Instead of describing “the woman” repeatedly, define her once as Maya and continue referring to her as Maya.
Should I Use the Same Prompt Every Time?
Reuse the character name and identity-preservation instructions, but update the scene-specific details.
Avoid repeating long physical descriptions. Focus each new prompt on the single element that needs to change.
Can Nano Banana Keep Multiple Characters Consistent?
Nano Banana Pro can preserve the resemblance of up to five people in a generation.
Each person should have a unique name and clearly assigned reference image.
For example:
Reference Image 1 is Maya.
Reference Image 2 is Daniel.
Reference Image 3 is Sofia.
Use those names consistently throughout the conversation.
What Should I Do When Only the Face Changes?
Ask the model to correct only the face while preserving all other elements.
Keep the clothing, pose, hands, background, lighting, composition, and
camera angle unchanged.
Correct only Maya’s face so it matches the uploaded reference image.
Preserve her exact facial structure, eyes, nose, jawline, hairstyle, and age.
Lock It In
Reference-image consistency is not about volume. It is about discipline.
Use two to four clean references. Give the character a distinct name. Preserve the correct elements explicitly, and change only one variable per prompt.
The core workflow is simple:
- Upload clear reference images.
- Define the character once.
- Assign the character a name.
- Use the same name in every prompt.
- Change one visual variable at a time.
- Edit the existing result instead of restarting unnecessarily.
Set up your workflow this way, and Maya is far more likely to remain Maya across every scene you create.
Open your best character image, assign the character a name, and test one controlled scene change. The difference should be immediately noticeable.