16 Jul 2026
Nano Banana Home Design: Whole-House Style Workflow
Introduction
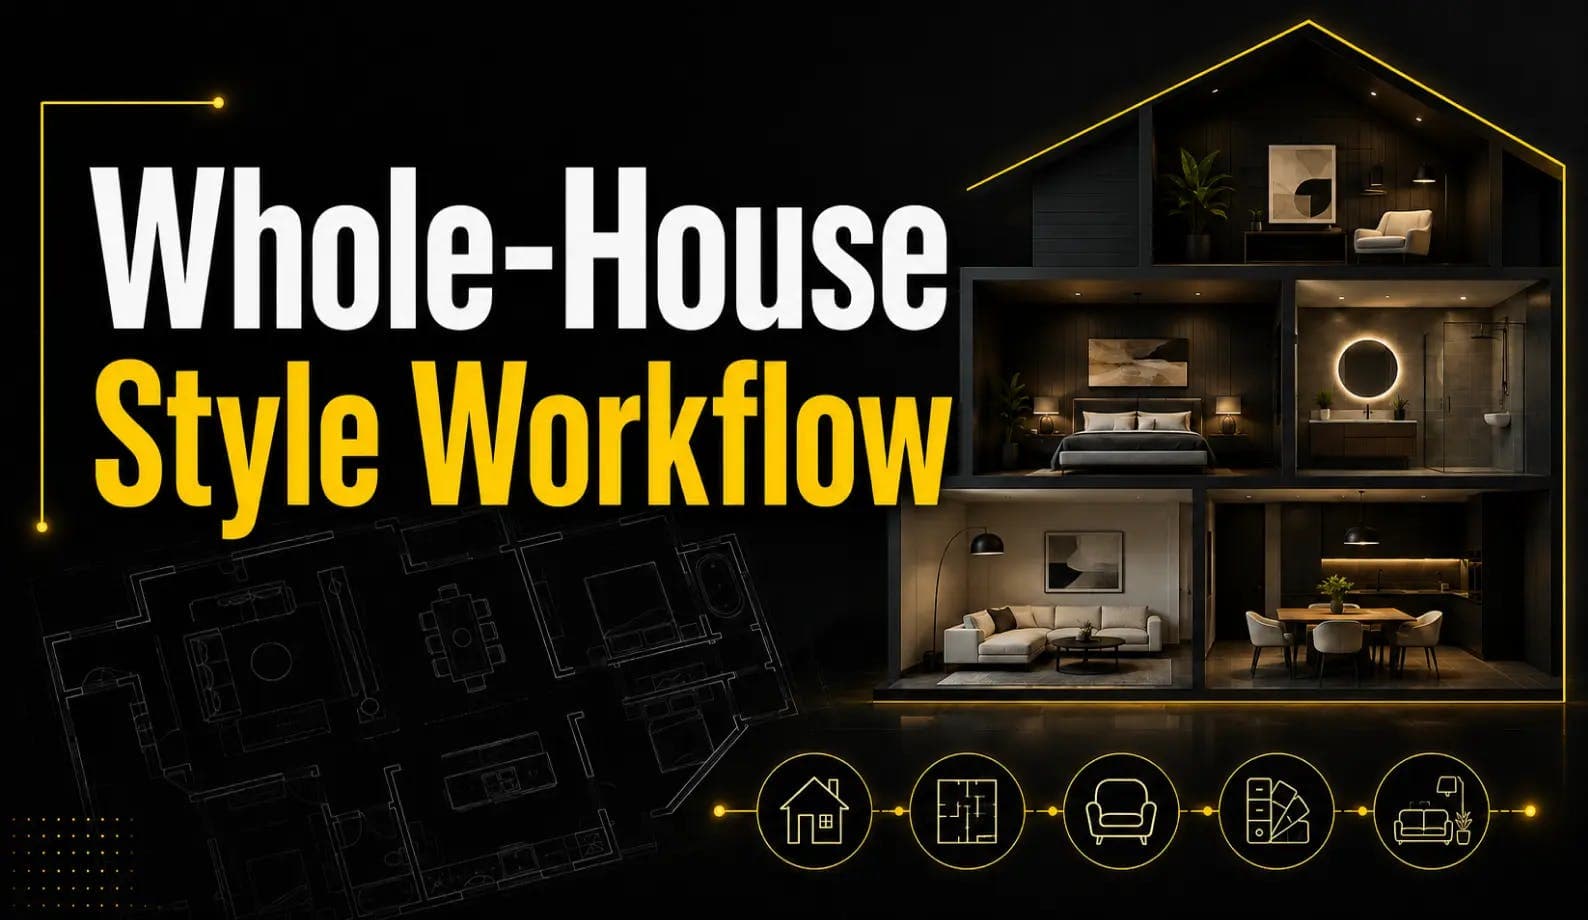
Designing one gorgeous room with AI is easy. Designing eight rooms that look like they belong in the same house is where most people fall apart.
The living room ends up warm Scandinavian, the kitchen drifts industrial, and the bedrooms feel like a different property entirely. A whole-house design is not eight good rooms—it is eight rooms that share one visual language.
Nano Banana home design solves this because the model preserves context. Instead of generating each room in isolation, you establish a style once and propagate it throughout the property.
This guide covers the exact workflow:
- Anchor
- Extract
- Propagate
- Refine
If you have not yet mastered individual rooms, start with our room-by-room Nano Banana design templates, then return to this workflow when you are ready to scale the same design language across an entire home.
Why Whole-House Consistency Is Hard
The core challenge is continuity.
Human designers hold a mental model of the entire home, including its:
- Colour palette
- Wood tone
- Lighting temperature
- Metal finishes
- Material language
- Overall atmosphere
They carry those decisions from one room to another.
Many AI tools regenerate each image from scratch, causing them to lose that thread. Even when every individual room looks attractive, the complete set may feel visually disconnected.
Why Nano Banana Handles Consistency Better
Nano Banana’s advantage is its ability to maintain scene context and visual consistency across edits.
According to ArchiLabs’ guide to Nano Banana for architecture, the model can preserve the appearance of a building or interior across different views, helping architects generate multiple angles without completely changing the underlying design.
Google also describes scene and character consistency as one of Nano Banana’s key strengths, particularly when users make several edits or generate alternative angles from the same reference.
Nano Banana Pro pushes this workflow further with:
- 2K and 4K output
- Improved localised editing
- Camera-angle adjustments
- Focus control
- Colour grading
- Lighting transformations
These capabilities make it easier to create a consistent, high-resolution collection of rooms rather than a group of disconnected one-off images.
The Five-Step Whole-House Workflow
Here is the sequence professionals can use to keep an entire home visually coherent.
1. Establish a Style Anchor
Choose one hero room, usually the living room, and design it completely before working on any other part of the house.
This first room becomes the visual standard for the project.
Lock These Decisions First
Before moving forward, finalise the:
- Main colour palette
- Secondary and accent colours
- Wood tone
- Metal finishes
- Flooring style
- Wall treatments
- Lighting temperature
- Material combinations
- Overall interior style
Do not begin designing the bedroom, kitchen, or bathroom while these choices are still changing.
Why the Living Room Usually Works Best
The living room normally contains the widest mixture of visual elements, including furniture, fabrics, flooring, lighting, decor, wall finishes, and architectural details.
Because of this, it provides a stronger style reference than a simpler room such as a bathroom or hallway.
2. Extract a Style Reference
Once the hero room is finished, use that completed image as a reference for the next room.
Your instruction should now become explicit rather than purely descriptive.
Style-Matching Prompt
Match the palette, wood tone, metal finishes, and lighting temperature of this reference image.
You are no longer trying to explain the entire style using words. You are pointing the model towards an approved visual example.
This reduces the risk of interpretation drift.
3. Propagate the Style From Room to Room
Generate the kitchen, bedroom, bathroom, dining room, and other spaces using the same reference image and a consistent prompt structure.
Reusable Whole-House Prompt
Match the interior design language of the attached reference image, including the same colour palette, wood tone, metal finishes, material language, and lighting temperature. Now render the kitchen with that identical style. Photorealistic, eye-level view, consistent daylight.
Replace “kitchen” with the room you are currently creating.
For example:
- Living room
- Kitchen
- Dining room
- Primary bedroom
- Guest bedroom
- Bathroom
- Home office
- Hallway
The reference image does most of the heavy lifting. You do not need to rewrite the complete design brief from scratch for every room.
Example Bedroom Prompt
Match the interior design language of the attached reference image, including the same colour palette, wood tone, metal finishes, material language, and lighting temperature. Now render the primary bedroom with that identical style. Photorealistic, eye-level view, soft daylight, realistic proportions.
Example Bathroom Prompt
Match the interior design language of the attached reference image, including the same colour palette, wood tone, metal finishes, material language, and lighting temperature. Now render the bathroom with that identical style. Use room-appropriate fixtures while preserving the same visual identity. Photorealistic and naturally lit.
4. Convert Floor Plans Into Renders
Nano Banana Pro can also be used to turn a two-dimensional floor plan into spatial visualisations.
A documented Fenestra floor-plan workflow demonstrates how users can generate both top-down staging concepts and eye-level interior views from a supplied plan.
Recommended Floor-Plan Sequence
- Upload the complete floor plan.
- Ask for a top-down, furnished visualisation.
- Confirm the room divisions and circulation.
- Request an eye-level view of one room at a time.
- Reuse the same style-anchor image for every room.
- Correct layout problems before refining decor.
Top-Down Floor-Plan Prompt
Convert the attached 2D floor plan into a top-down, fully staged residential interior. Preserve the visible walls, room divisions, door positions, windows, circulation paths, and approximate proportions. Apply the design language of the attached style-reference image, including its colour palette, materials, wood tone, metal finishes, and lighting.
Eye-Level Room Prompt
Using the attached floor plan and approved style reference, generate an eye-level view from inside the living room. Preserve the room’s placement, openings, approximate proportions, and connection to adjacent spaces. Match the same palette, materials, wood tone, metal finishes, and lighting temperature.
Important Floor-Plan Limitation
AI-generated floor-plan renders are best treated as concept visualisations rather than technically exact architectural documents.
They may interpret proportions, furniture positions, doors, windows, or circulation differently from the source plan. Use CAD, BIM, or professional architectural drawings whenever dimensional accuracy is required.
5. Refine Sequentially
Do not change everything in a single pass.
Instead, refine one variable at a time across the whole collection.
Recommended Refinement Order
- Materials
- Lighting
- Furniture
- Decor and artwork
- Scale and proportions
- People or lifestyle elements
- Camera angles
- Final image quality
Sequential refinement keeps every room moving in the same direction.
For example, first correct the wood finish across all rooms. After that, adjust the lighting across all rooms. Then refine the decorative details.
This approach is more reliable than heavily editing one room while leaving the others unchanged.
Quick Reference: What to Lock and What to Change
Keep the locked elements identical throughout the house. Change only the room-specific elements.
| Lock Across All Rooms | Change Per Room |
|---|---|
| Colour palette | Furniture type and layout |
| Wood tone | Room-specific fixtures |
| Metal finishes | Decor and artwork |
| Lighting temperature | Camera angle |
| Overall style label | Scale and function |
| Material language | Functional storage |
| Visual mood | Room-specific accessories |
The Core Rule
Lock the design language. Change the room function.
A bathroom does not need the same furniture as a living room, but it should still use related colours, finishes, materials, and lighting.
A Practical Whole-House Prompt System
A structured prompt system makes it easier to repeat the same design decisions across many rooms.
Base Style Anchor
Use the attached hero-room image as the primary style reference for this entire home.
Locked Design Elements
Preserve the same colour palette, wood species and tone, metal finish, flooring family, wall treatment, material language, lighting temperature, and overall level of visual warmth.
Room-Specific Instruction
Apply that design language to the kitchen while selecting furniture, storage, appliances, and fixtures appropriate for a functional residential kitchen.
Camera and Quality Instruction
Photorealistic architectural interior photography, natural eye-level perspective, realistic scale, balanced composition, consistent daylight, accurate material texture, and no text or watermark.
Complete Prompt Template
Use the attached hero-room image as the primary style reference for this entire home. Preserve the same colour palette, wood species and tone, metal finish, flooring family, wall treatment, material language, lighting temperature, and overall level of visual warmth. Apply that design language to the [ROOM NAME] while selecting furniture, fixtures, storage, and decor appropriate for its function. Photorealistic architectural interior photography, natural eye-level perspective, realistic scale, balanced composition, consistent daylight, accurate material texture, and no text or watermark.
Professional Use Cases
This workflow is not limited to homeowners. It maps directly onto paid design and visualisation work.
| Role | How They Use It |
|---|---|
| Interior Designers | Test materials, palettes, furniture arrangements, and camera angles in minutes to communicate concepts to clients. See our Nano Banana interior design mockups guide for client-deliverable workflows. |
| Architects | Turn floor plans into concept renders for early-stage client conversations and generate multiple consistent views of the same space. |
| Real Estate Stagers | Virtually stage empty rooms and create cohesive whole-home tours from a collection of bare property photos. |
| Property Developers | Explore multiple design directions before committing to expensive materials or construction decisions. |
| Furniture Brands | Place coordinated products throughout a complete home while maintaining a consistent campaign aesthetic. |
Benefits for Interior Design Workflows
Generative AI can reduce the time required to explore early concepts, compare design directions, and create presentation-ready visuals.
Instant Interior AI estimates that AI-assisted tools can reduce planning costs by up to 75% in complex projects and may reduce late-stage design changes by around 25%.
First Chair also reports that studios adopting AI tools have seen average revenue increases of approximately 23% within 12 months, alongside shorter project timelines.
These figures should be treated as industry estimates rather than guaranteed results. Actual savings depend on the project, team, tools, revision process, and level of technical accuracy required.
See a Floor Plan Become a Home
The following tutorials demonstrate floor-plan rendering and consistent architectural visualisation workflows.
Turn Floor Plans Into 3D Homes Instantly
This tutorial covers the floor-plan-to-render step that anchors the whole-house workflow:
Watch: Turn Floor Plans Into 3D Homes Instantly | Nano Banana Tutorial — approximately 11 minutes
More Nano Banana Architecture Tutorials
Two additional walkthroughs worth adding to your queue are:
- INSANE Ways to Use Nano Banana Pro for Architects — approximately 18 minutes.
- Create Luxury House Tours With Nano Banana Pro and Lovart — approximately 14 minutes.
The second tutorial demonstrates a broader real-estate visualisation workflow, including consistent interiors, exterior scenes, multiple angles, and cinematic house-tour concepts.
Common Whole-House Design Mistakes
Generating Every Room From Scratch
Writing a new style prompt for each room allows the interpretation to change.
Use the approved hero-room image as the reference every time.
Changing Too Many Variables at Once
A prompt that simultaneously changes materials, furniture, lighting, camera angle, decor, and architecture can produce unpredictable results.
Refine one category at a time.
Using Inconsistent Reference Images
Do not use a warm Scandinavian living room as one reference and an industrial kitchen as another unless you intentionally want a mixed-style interior.
Ignoring Lighting Temperature
A room lit with cool blue daylight will not feel connected to another room rendered with warm amber lighting, even when the furniture and palette are similar.
Treating AI Renders as Construction Documents
AI images are valuable for ideation and communication, but they do not replace CAD drawings, engineering details, specifications, or measured plans.
Frequently Asked Questions
How Do I Keep Every Room in the Same Style?
Design one hero room completely, then use that finished image as a reference for every other room.
Explicitly instruct the model to match the:
- Colour palette
- Materials
- Wood tone
- Metal finishes
- Lighting temperature
A reference image enforces consistency more effectively than repeatedly using a broad style label such as “modern luxury” or “warm Scandinavian.”
Can Nano Banana Turn My Floor Plan Into a 3D Render?
Yes. Nano Banana Pro can interpret a two-dimensional floor plan and generate top-down staged concepts or eye-level walkthrough-style images.
However, the resulting images should be treated as design concepts. Always verify room dimensions, walls, windows, doors, and circulation using proper architectural software before construction.
Do I Need Nano Banana Pro for Whole-House Work?
Nano Banana Pro is helpful because it supports higher-resolution output and stronger creative controls, including 2K and 4K generation, localised editing, camera changes, focus adjustments, and lighting transformations.
The base model can still work well for simpler or lower-volume projects.
Is Nano Banana Good Enough for Client Presentations?
For concept development and early-stage communication, yes. The outputs can look highly photographic and can help clients understand materials, atmosphere, furniture placement, and visual direction.
For construction documents, measured plans, electrical layouts, or technical specifications, you will still need CAD, BIM, and professional documentation.
Which Room Should I Design First?
The living room is usually the strongest anchor because it contains a broad mixture of furniture, materials, lighting, textiles, flooring, and decorative elements.
However, another room may work better when it defines the home’s identity more clearly.
Can I Use More Than One Style Reference?
Yes, but each reference should have a clear purpose.
For example:
- One image for the colour palette
- One image for furniture style
- One image for material finishes
- One floor plan for layout
Avoid combining references that conflict with one another.
How Many Rooms Should I Generate at Once?
Generate and refine one room at a time.
Creating multiple rooms in one image or one prompt can reduce control and make it harder to correct individual spaces.
Build the Whole Home, Not Just a Room
Stop generating rooms in isolation.
Design your hero room, turn it into a reference, and let that single anchor carry the palette, materials, wood tones, metal finishes, and lighting through every space.
The process is simple:
- Finish one room completely.
- Lock the visual language.
- Reuse the room as a reference.
- Apply the style to each new space.
- Refine one variable at a time.
Start by fully finishing one room. Then watch how quickly the rest of the house falls into line.